Prosthetic Instructions
- Prosthetic Rehab Plan
- Desensitization Instructions Over The Skin
- Desensitization Instructions Over The Gel Liner
- Exercises Required to be able to Use a Prosthesis
- Side Lying Hip Rises
- Bridging
- Sitting and Standing
- Standing at the Kitchen Sink
- Wheelchair Pushups
- Additional Exercises
- Liner Instructions
- Sweat Management
- Volume Management/ Limb Atrophy
- Parts of the Prosthesis
- Emotional Adjustment To Your Amputation:
- Mirror Therapy
Prosthetic Rehab Plan
First 4-6 weeks after surgery- Until sutures are removed, follow the instructions below:
- Gently wash your limb daily with anti-bacterial soap and water
- Wear stump shrinker to control swelling in residual limb AT ALL TIMES
- Wear APOP (adjustable post operative protector) to prevent knee flexion contractures AT ALL TIMES.
- To prevent hip flexor contracture, for at least 20 minutes per day and while you are asleep, lay completely flat on stomach. This help stretch hip flexor muscles.
- To prevent knee flexion contractures squeeze the thigh muscles to tighten your kneecap. Tighten this muscle and hold for 5-10 seconds, repeat 50 times per day.
6-8 weeks after surgery-After ALL sutures are removed
- Typically, it takes 6 to 8 weeks for a limb to be in the condition to begin the process of fitting the prosthesis
- To be able to walk on a prosthetic limb, your limb must be completely healed and able to tolerate weight bearing, and pressure.
- If you cannot moderately massage your limb without pain, then you must understand that you cannot expect to walk efficiently until this is possible
Preparing for prosthetic training
At this point in your rehabilitation, there are five techniques you can use to prepare your residual limb for prosthetic training: Massage, Tapping, Desensitization, Scar Mobilization, and Limb Muscle Exercises.
- Massage and Tapping- Early massage and tapping of your residual limb will help you develop a tolerance in your residual limb to both touch and pressure. Both of these techniques can be performed through your soft compression dressing and when the soft compression dressing is off. Additionally, these techniques may help decrease your sensation to phantom pain.
- Desensitization- Desensitization is the process of making your residual limb less sensitive. If you start with a soft material and progress to rougher materials, desensitization can help you increase your tolerance to touch in your residual limb.
- Scar Mobilization- This technique is done to keep the skin and scar tissue on your residual limb loose. Scar adherence to underlying tissue can be a source of pain when using your prosthesis and can also cause blistering. This technique is best performed when you are not wearing your compression dressing.
- Limb Muscle Exercises- Performing limb muscle exercises will help with your ability to control the prosthesis and walk without a limp.
Desensitization Instructions Over the Skin
** These should not be preformed unless given clearance from your Prosthetist
** These should not be preformed until all sutures/staples are removed
1. Perform SCAR MASSAGE exercises directly over the skin of the incision daily
- Prep this area heavily with a petroleum based lotion
- Perform each motion 4 times per day for 2 minutes at a time.
- Up/Down
- Circular
- Left/Right
- The amount of pressure should cause a pain of 7 out of 10 sensation on a pain scale with 1 being no pain and 10 being severe pain. Please inform prosthetist if you have neuropathy.
- DO NOT perform this exercise on any area which has an open wound
2. Perform TAPPING EXERCISES at the end of your limb where it is healed; use a rolled up newspaper or magazine and tap the healed area of the incision with just enough force to cause very minimal discomfort. Perform these 5 times daily, 2 minutes per session.
3. HAND PULLS:
- Interlock hands, place over the end of the stump and pull towards your chest until 7/10 pain is reached, then hold for 5 seconds.
- Slowly release tension on your residual limb
- Interlock hands and pull towards your chest while moving the end of the stump side to side until 7/10 pain is reached and continue movement for 15 seconds.
- Slowly release the tension on your residual limb
- Interlock hands and pull towards your chest while moving the end of the stump front to back until 7/10 pain is reached and continue movement for 15 seconds.
- Slowly release tension on your residual limb
- Complete 4, 5 minute sessions per day
4. If you experience any skin irritation from either scar massage or tapping exercises, then discontinue performing these and contact our office immediately for further instructions.
Desensitization Instructions Over the Gel Liner
Perform these exercises 4 times a day for 5-10 minutes each time.
All exercises should cause pain level of 7/10 when you first start. If the exercise is not causing some discomfort it is not effective. When you first start these exercises, the first 5 days are the worst. It will get better after 5 days. After this the pain level will gradually get better until eventually the exercises will only cause “discomfort” or 2/10 pain. Once you have little to no pain with each exercise you will move on to the next exercise. All exercises are in sequential order, and you should not go to exercise 2 until exercise 1 causes NO pain. After exercise 1 causes NO PAIN, then go to exercise 2, and so on. If you perform these exercises properly
pain while wearing your prosthesis should reduce dramatically.
None of the exercises should cause bruising or open sores. If you develop bruising or open sores contact us immediately.
Perform the Following Exercises with the Gel Liner On!
1. Hand Tapping Exercises
- Use your hand to beat all around the end of your leg
- Once your pain level is down to 4-10 move on to MAGAZINE TAPPING
2. MAGAZINE TAPPING
- Start with 1 magazine rolled up and beat all around the end of your limb
- Once this does not hurt move to 2 magazines rolled up
- Once this does not hurt move to 3 magazines rolled up
3. Hand Pulls
- Interlock hands, place over end of limb, pull until 7/10 pain and hold 5 seconds
- Perform this exercise with hand placed on front and back of end of limb
- Also perform with hand on sides of limb
4. Hand pulls with ROLLING AND PULLING
- Interlock hands place over end of limb, pull end of limb towards body while moving the end of the limb side-side and front-back for 5 seconds.
Once you can beat all around the end of your limb with 3 magazines rolled up and you can perform hand pulls with rolling and pulling with no pain, you will no longer have any pain in your prosthesis.
- These should not be done without clearance from prosthetist
- These should not be performed until all sutures/staples are removed
- If you have neuropathy you will require further instructions
Exercises Required To Be Able To Use a Prosthesis
Side Lying Hip Raises
- Lie on the amputated limb side with a towel placed securely under your limb. Place a stool, or a large pillow, directly in front of your hips, bending both your unaffected hip and knee to 90 degrees so that your leg rests on the stool.
- Press your residual limb into the towel, raising your hip off the ground. Hold this position for 5 seconds, then slowly lower yourself back down The goal is to do 20 reps, 3 times per day
https://youtu.be/V_DC-vb0QEQ?list=PLMSWTaX5vX4xCIcXtbb3vH-n_yHy2lO9e
Bridging
- Lie on your back with a rolled up bath towel placed securely under your amputated side.
- Press amputated limb firmly into towel raising your buttocks off the resting surface. Hold this position for 5 second then slowly lower yourself back down. The goal is to do 20 reps 3 times per day.
https://youtu.be/gCWKGyrHgGc?list=PLMSWTaX5vX4xCIcXtbb3vH-n_yHy2lO9e
Sitting and Standing
Pull your wheelchair up to the kitchen sink and lock wheels. Grabbing hold of the sink, practice standing up then slowly sitting back down. The goal is to do 25 reps 3 times per day.
Standing at Kitchen Sink
Pull your wheel chair up to the kitchen sink and lock the wheels. Grab hold of the kitchen sink and stand. The goal is to stand for 10 minutes
Wheelchair Pushups
Sitting in your wheelchair with both feet on the ground, push down on the armrests until your elbows are locked and your bottom is completely off of the wheelchair seat. Hold this position for 5 seconds. Slowly lower yourself back down into the seat of the wheelchair. The goal is to do 25 reps 3 times per day. Once you can do this with both feet on the ground, start doing it with one foot on the ground and one foot off of the ground. Once you can do this, try to keep both feet off of the ground while you do the exercise. Please be carful, and ask anyone of us to demonstrate these exercises if you have any questions.
Additional Exercises
Liner Instructions
- Put the liner on FIRST thing in the morning as soon as you wake up.
- Wear the liner during the daytime ONLY
- DO NOT wear the liner when sleeping at night
- Clean the inside of the liner daily with anti-bacterial soap and water every day.
- Lever or Dial soap are recommended
- You can also use rubbing alcohol, 90 percent, and spray the inside of the liner daily
- You may also use baby wipes to wipe the inside of the liner
- DO NOT WASH THE LINER WITH DISH LIQUID
- Put the liner on by turning it inside out COMPLETELY and rolling it up your leg
- There should be NO SPACE between the bottom of your residual limb and liner
- If you develop a rash on your leg around the top of the liner use Hydrocortisone cream on the rash.
- Remove the liner every 2 hours to wipe your leg and liner off for sweat and leave it of for 1 hour. Then re-apply
- Wear the brown stump shrinker at night or whenever you do not have the liner on.
- Put the liner on the drying stand or on the foam block to dry at night.
- Always let the liner dry for a full 24 hours before wearing it again.
- Alternate liners daily so that you wash one liner while you are wearing the second liner.
- It may be helpful to mark your liners with an “A” and “B” to know which liner to wear and which to clean.
Sweat Management
Sweat management can be one of the most challenging issues for the active amputee to learn to deal with. Excessive sweat is often the cause of painful friction rubs, which will likely limit your activities and can be a big concern for infections. If may be one or a combination of several of the scenarios we go over below that could be your particular issue, so be patient and keep trying until finding the perfect combo. The benefits are worth it! Remember, when trying anything new irritation can occur and in general skin irritation issues should get better, not worse. If any skin irritation is experienced from using any of these methods and continues to get worse, then discontinue immediately and consult a professional.
- Sweat Sock Under Gel Liner- These systems for suction prosthesis, NOT for pin locking systems. The sock should go about 3”s above the knee. The GEL liner needs to be making direct contact with at least 3” of skin above the sweat sock in order to get proper suction.
The socks are available in 3 different levels of compression and you will need to consult with the prosthetist for sizing. If you have a short BK limb (less then 5”s) or you have excessive skin grafts, a sweat sock may not work for you due to loss of gel liner linkage and skin graft irritation with sock materials. - Antiperspirant- Some find that applying antiperspirant (NOT DEODERANT) on the limb the night before activity helps. Generally, the unscented version is the least aggravating. The key is the level of Aluminum in the antiperspirant needs to be 12%-15% to achieve functional decrease in perspiration.
Certain-Dri, Arrid XXtra dry have worked well and both are easily available in roll on and spray. - Thicker Gel Liners- Thicker gel liners increase sweat production by increase heat retention
- Undergarments Especially For Above Knee Amputees- “COTTON IS ROTTEN”- do not wear cotton undergarments. Take a look at your underwear/fabrics! It is a great strategy to wear running spandex beneath normal running shorts for optimal heat management as well as stability for the prosthesis. Different fabrics can make a big difference so it is worth trying several and seeing what works best for you. These also work well to control friction from the top edge of the socket for above knee amputees.
- 80/20 polyester/spandex jockey brand H-fly are a recommend brand that we have seen success with.
- How well does your prosthesis fit?- If your prosthesis fits very loosely and you are wearing 2-3 socks, the increased sock layers will increase the socket environment temperature and you will sweat.
Volume Management / Limb Atrophy
Your Limb will change shape over time. Your leg will change shape the most during the first 6 months. Your limb will get smaller during this time and it will get smaller directly related to how active you are. The result is that, in the first year, you will need to wear more and more socks as days, weeks, and months go by.
The more you wear your prosthesis and walk the faster it will shrink to the final size. Your limb will change shape in 2 main ways:
- It will get shorter in total length
- Mostly during the first year by as much as 1” in length depending on type of surgery
- You will need to add ¼ socks or gel dots to adjust for this
- You can adjust the length difference with gel dots that can be placed in the end of the socket, or put on the end of your limb to restore the lost length.
- Your limb will get smaller in circumference, mainly over the distal half of the limb
- You will need to add socks over the bottom half of your limb (below the knee cap)
- Theses socks are available in different lengths
Once your limb has shrunk down to the final size, it will still change shape on a daily basis.
Daily Limb Shape Change Will Occur In The Following Pattern:
- Your leg will be the largest first thing in the morning
- Your leg will get smaller during the day while you wear your prosthesis
- You will need to add 1-2 socks during the day over the bottom half of the limb
- You have 2 choices
- You can put on an extra sock on first thing in the morning. This will make the prosthesis feel tight for 10-15 minutes, then it should start to feel better.
- You can wait 1-2 hours and then add a sock
Fit Issues:
- If you feel too much pressure under your knee cap and at the bottom of your limb and/or your socket feels abnormally loose, then you may need to add a sock to the fit.
- If you feel too much pressure under on the sides of your knees and/or your socket feels excessively tight, then you may need to remove a layer of socks around the kneecap.
Prosthetic socks vary in thickness. The thickness are called “Plys” and are available in the following options:
- 2 ply (Quarter sock)- Has a Black line around the top of the sock
- 2 ply (Half sock)- Has a blue line around the top of the sock
- 3 ply- Has a green lie around the top of the sock
- 6 ply- Has a Red line around the top
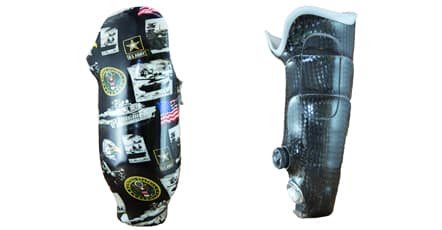
Parts of the Prosthesis
It is helpful to understand the general terminology used to describe the different parts of the prosthesis. This will allow you to communicate with the prosthetist more easily to ensure that you get the best fitting prosthetic possible, as well as being able to pin point problem areas.
Gel Liner
- Is rolled onto your limb before the prosthesis is put on
- Is open on one end and closed on the other
- It provides cushion for your boney areas and protects your skin
- It may or may not have a serrated pin attached to one end depending on the suspension method of your prosthesis
Gel Sleeve
- Is attached to your prosthesis and is rolled onto your thigh after the prosthesis is on
- Is open ended on both sides
- Keeps your prosthesis attached to your body

Shrinker
- Is worn on your limb when the prosthesis isn’t being worn
- Helps reduce swelling in limb
Prosthetic socks
- Are worn on the outside of your Gel liner
- Help tighten the fit of the prosthesis when it feels loose
- Can prevent discomfort and sores when used appropriately
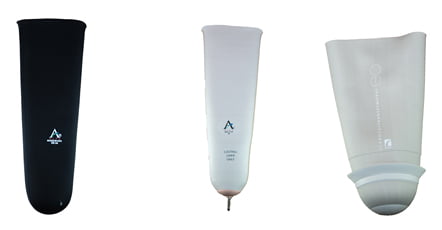
Test Socket (Used for both above and below the knee prosthetics)
- Is a clear socket that the prosthetist uses to see how the prosthesis fits, and if changes need to be made to its shape.
- Can be used until the final carbon fiber socket is made for limbs amputated below the knee joint.
Laminated Carbon Fiber Socket (Used for both above and below knee prosthetics)
- Is stronger than a test socket and must be used for long term safety concerns
- Usually fit 2-3 weeks after mold of your limb has been completed
- For limbs take amputated above and below the knee
Emotional Adjustment to Your Amputation
An amputation represents an emotional as well as physical loss that requires time for adjustment. Everyone who loses a limb must in some way grieve the loss of that body part as one would grieve the death of a loved one. Each person feels differently following amputation, depending on his or her personality and unique experience. There are a number of emotions that you might experience after your amputation, including:
- Depression because of the loss
- Anxiety because of the experience of dependence
- Anger in question why this should happen to you
- Feeling different due to your body changes
- Relief from the pain and stress of trying to save the limb
- Fear about changes in our ability to work
- Concern about relationships with family and friends
- A sense of accomplishment in overcoming a crisis
- Fear of handling your residual limb or prosthesis
- Embarrassment and avoidance of public places
- Frustration because of a lack of function
Signs of Depression:
Clinical depression is common in people with amputation and it is very treatable. It is important to watch for such problems as:
- Ongoing sadness, irritability, fear of nervousness
- Difficulty in sleeping
- Loss of appetite
- Loss of interest in life
- Ongoing preoccupation with the cause of amputation
- Withdraw and isolation
- Use of alcohol or drugs to escape or manage your feelings
- Difficulty following therapy recommendations
If you notice that any of these feelings persist, talk with your physician; he or she should be happy to arrange a mental health consultation.
Resources:
The Rehabilitation Institute of St. Louis
Amputee Support Group, “AGILE” For Survivors, Family Members, and Significant Others
Date: Third Wednesday of each month
Time: 7-9 p.m.
Location: Held at different places in the community
Contact: 314 658-3946 for more information
Facebook page - St. Louis Amputee Peer Society
Mirror Therapy
Instructions
- Patient places mirror between legs
- Patient then moves intact foot VERY SLOWLY while viewing image in mirror and simultaneously moving amputated (or the phantom limb) foot to do the same movements seen in the mirror. Plantar flexion and extension (bending foot up and down at the ankle similar to stepping on a gas pedal) and foot rotation at the ankle (making circles) are the easiest movements.
- Movement speed of intact foot can increase once patient reports sensation of movement of the phantom keeping time with what the subject views in the mirror.
- Prior to therapy each day, measure your 1-10 pain scale and duration of episodes in the past 24 hours to track response to mirror therapy.
- Recommend 15 minutes daily therapy for 5 days each week for 4 weeks. May continue as needed for up to 8 weeks.
Copyright Orthotic & Prosthetic Lab, Inc. - All rights reserved.
Medical Website Design by Silver Scope Web Design in St. Louis, MO